How to combine JPG images into one PDF
Receipts, scanned pages and photographed forms are easier to share as one document. PDFDesk turns each JPG or PNG into a PDF page, with controls to arrange the order before you download.
Open Images to PDFPrepare the images
Use JPG or PNG files. Crop away unnecessary backgrounds and rotate sideways photos before adding them: this tool places the images as they are. Check that the writing is sharp and that no page edges are missing.
If your phone uses HEIC, export or convert the photos to JPG or PNG first. Renaming a file extension does not convert its contents. The combined input must stay below 50 MB.
Create the PDF
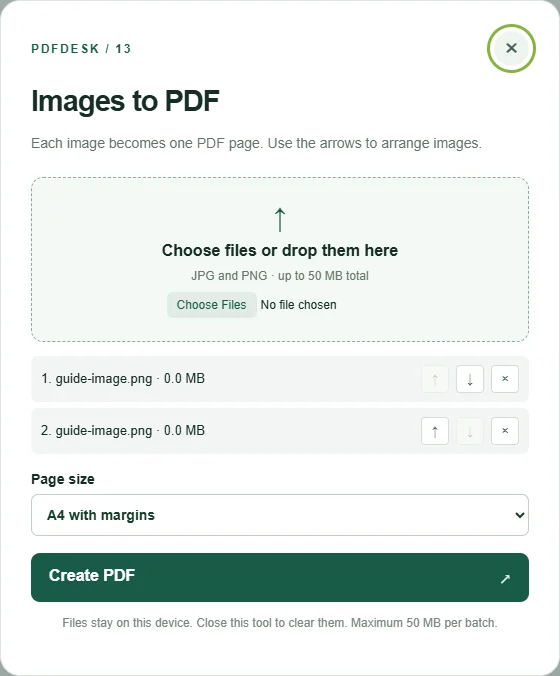
- Open Images to PDF and choose your JPG or PNG images. You can select several files or add more afterward.
- Use the up and down arrows beside each filename to arrange the pages. The first image in the list becomes page 1.
- Remove an unwanted image using its × button.
- Choose Fit to image or A4 with margins.
- Select Create PDF, then download and open the result to check every page.
Fit to image or A4?
Fit to image gives each page dimensions based on its image. A group of differently shaped images can therefore produce differently sized PDF pages.
A4 with margins places each image on a portrait A4 page, keeping its proportions and adding space around it. It is useful for a consistent document, though a landscape photo will appear smaller on the portrait page.
For example, to submit three receipt photos in date order, arrange the oldest first, select A4 with margins, and check that all three receipts remain readable in the downloaded PDF.
What to expect from the output
The PDF contains images, not newly recognized text. You cannot search photographed words unless the document is processed with OCR elsewhere. Large, high-resolution images can also make a large PDF; the Compress PDF tool can help afterward if a smaller file is needed.
All image processing happens in your browser. Keep the original images until you have checked the final document.